Clinic Demo Walkthrough
A complete guide to the Naviget Medical Imaging Platform for Clinic Staff & Sales Engineers
Step 1
Step 1
Before you begin, make sure you have:
- A modern web browser (Chrome, Edge, or Safari)
- A valid business email address
- DICOM files or a sample patient folder
- A stable internet connection
Open your browser and navigate to naviget.com. You will see the landing page with sign-in options.

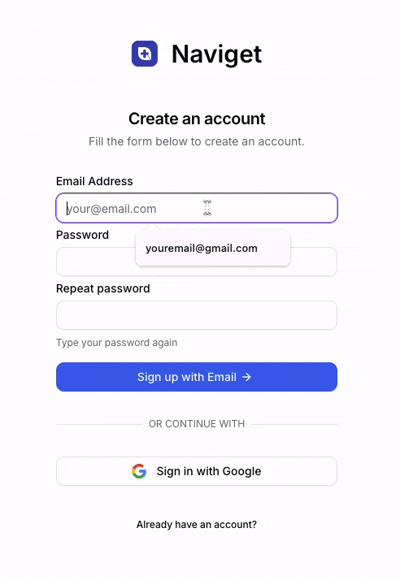
Step 2
Step 2
Creating your account takes about 2 minutes:
- Click "Sign Up for Business"
- Complete the form: Org Name, Full Name, Business Email, Password
- Click "Create Account"
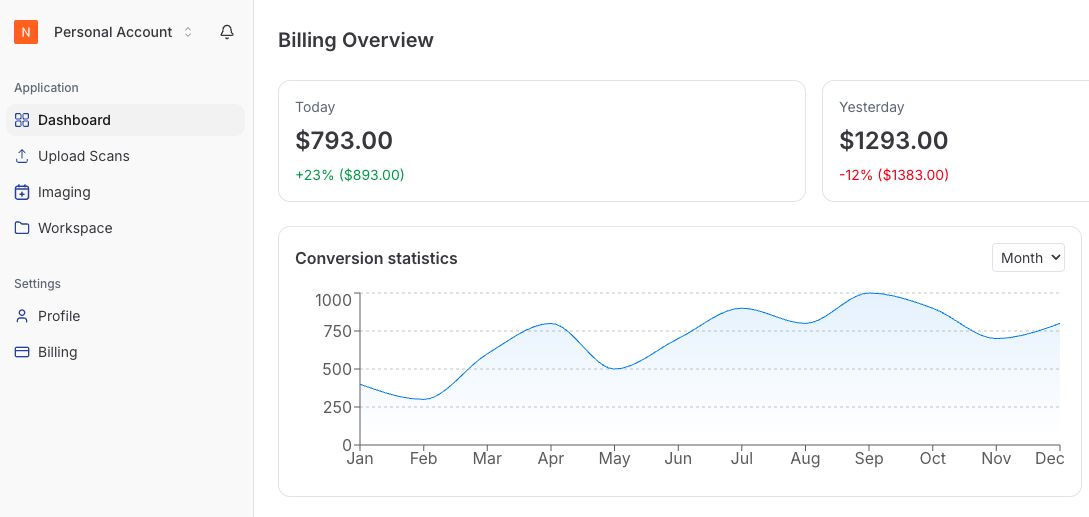
Step 3
Step 3
Once logged in, the dashboard gives you an overview of your activity and quick access to all platform features.
| Section | Purpose |
|---|---|
| Welcome Banner | Personalized greeting & quick actions |
| Credit Balance | Available credits for features |
| Recent Activity | Latest uploads/activity |
| Quick Actions | Fast access to common tasks |
The sidebar navigation includes: Dashboard (Overview), Workspace (Manage patients & scans), Credits (Purchase/manage credits), and Teams (Manage members).
👆 Navigate to Workspace: Click "Workspace" in the sidebar to begin.
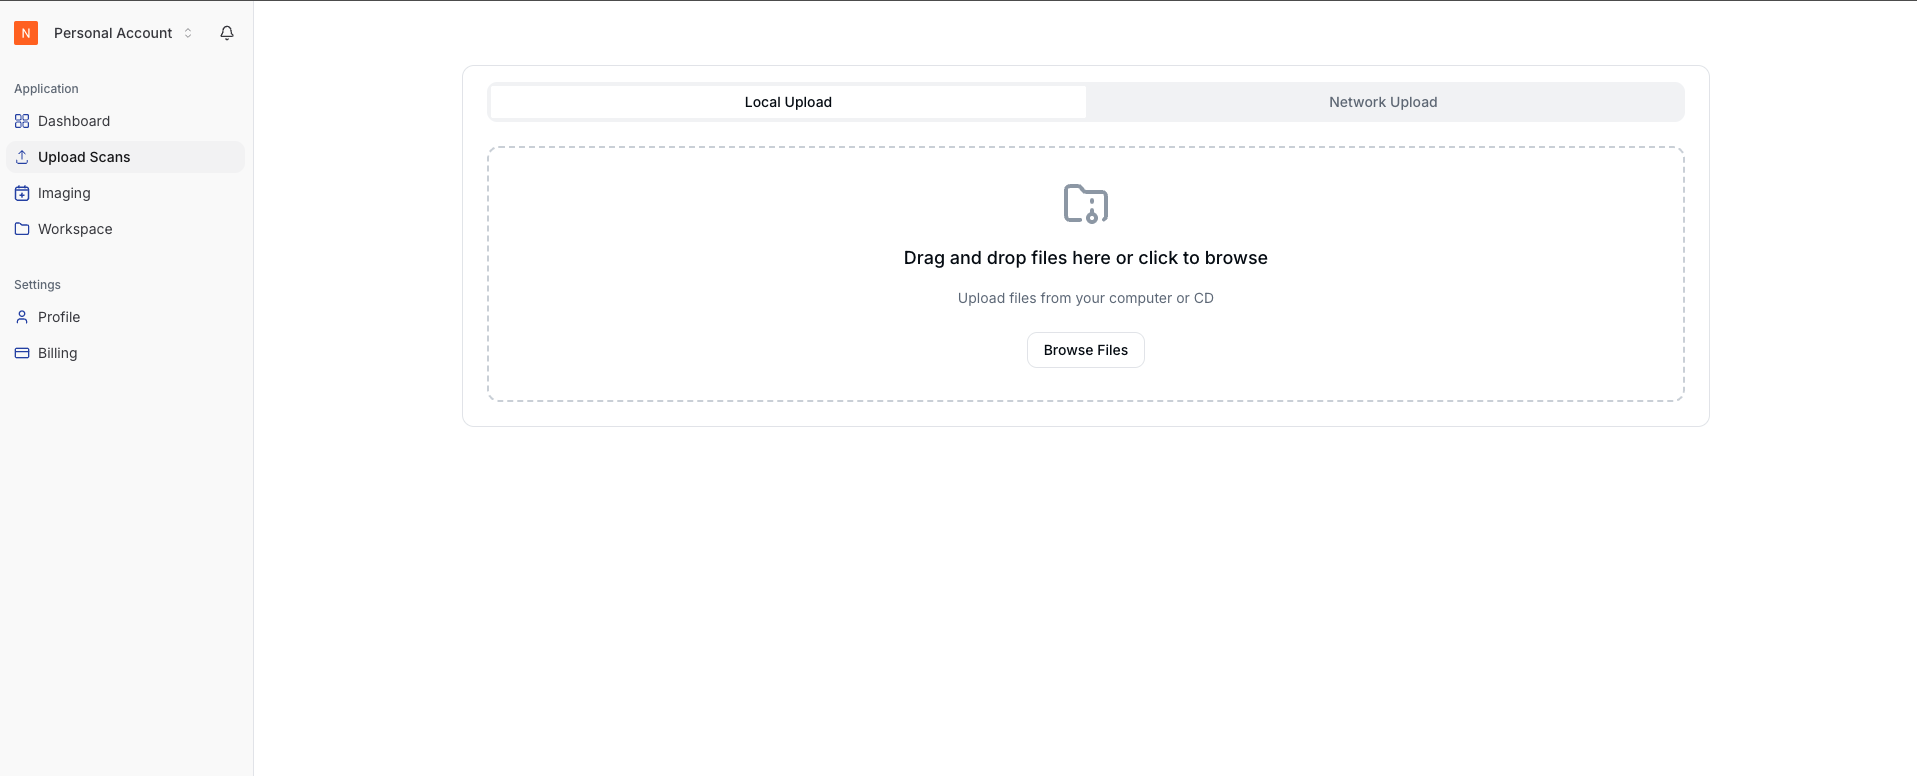
Step 4
Step 4
The Workspace is the central hub for managing all patient data. You can switch between Grid/List views, search by Name or MRN, and upload folders.
Estimated Time: 1–3 minutes
- Click "Upload Folder" (top-right)
- Drag and Drop folder OR Browse to select
- Auto Metadata Extraction: System detects DICOM files and extracts Name/MRN automatically
Step 5
Step 5
Immediately after metadata extraction, a modal appears to set up sharing before upload completes.
| Field | Description |
|---|---|
| Patient Name | Pre-filled from DICOM |
| For share link | |
| Phone | Required for OTP (E.164) |
| Expiry | 7, 14, or 30 days |
| Report | PDF, DOCX, etc. (Max 10MB) |
💡 Demo Tip: Auto-share is the fastest way to get results to patients.
Step 6
Step 6
The Upload Progress Panel shows real-time status visible across the platform:
- Analyzing: Extracting metadata
- Awaiting Share Intent: Waiting for user input
- Uploading: Transferring files
- Complete: Ready
- Error: Failed (Retry option)
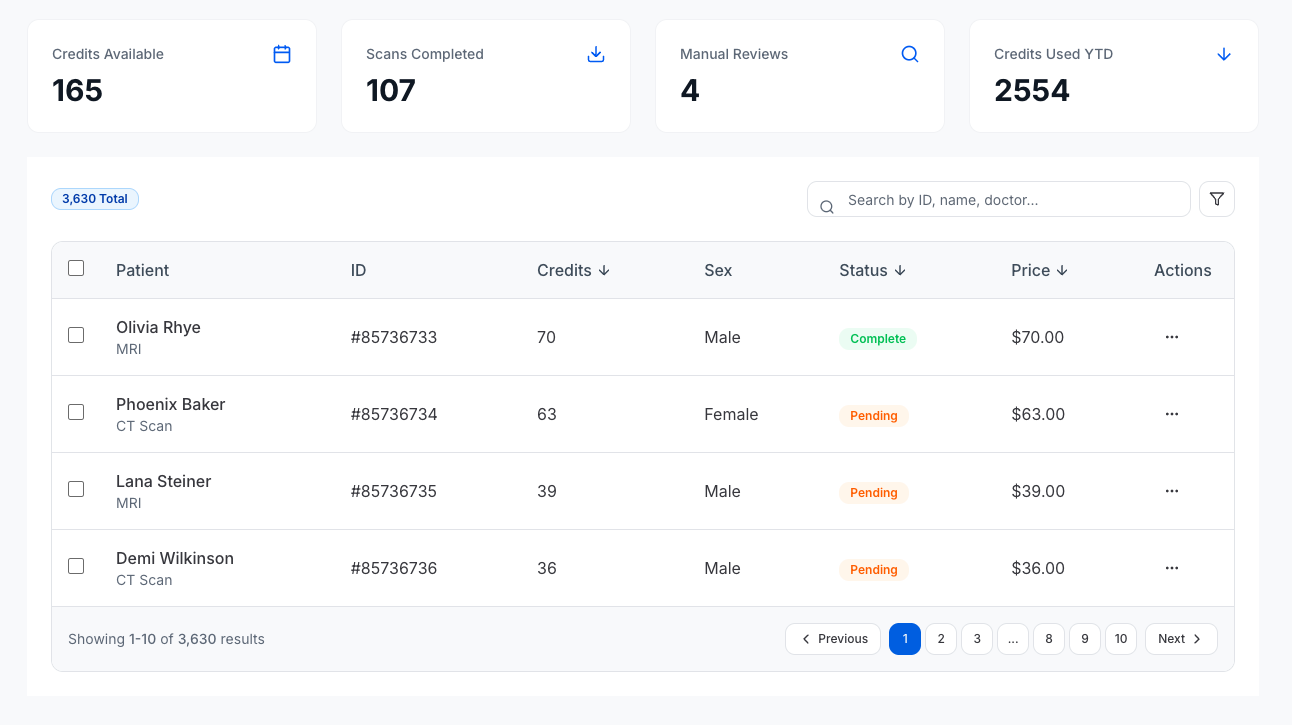
Once upload completes, the patient card appears in your Workspace showing: Patient Name & MRN, Sex/Age, Modality Badges (CT, MRI, X-Ray), number of studies, last upload date, and a Share Button.
✅ The patient card should appear within seconds of upload completion.
Step 7
Step 7
Clicking a patient card reveals all studies. Each study expands to show Series with thumbnails, descriptions, modality, and status badges.
The Series Detail page has tabs for:
- Details: Metadata & DICOM UIDs
- Viewer: Interactive DICOM viewer (scroll slices, zoom, window/level)
- Video: 3D & Narrated videos
- 3D: Interactive model viewer
- Files: Downloadable ZIPs
✨ Request AI Features: Click the gradient button to generate videos.
Step 8
Step 8
Use this method if you skipped auto-share during upload.
Quick Share (Workspace): Click "Share" on the patient card — shares all studies/series.
Series Share: Click "Share" inside a specific Series Detail page for granular control.
Steps to Share
- Enter Patient Email
- Enter Phone (+1 234 567 8900 format)
- Set Expiry (Recommended: 7 days)
- Upload Medical Report (PDF/DOC/PNG)
- Click "Share"
🛡️ Security: Patient verifies via OTP, links expire automatically, access can be revoked anytime, and opens are tracked.
Step 9
Step 9
Click "Manage Links" from the Workspace to view all share links with stats: Total, Active, Expired, and Revoked. Filter by status or search by Patient Name/Email.
| Column | Info |
|---|---|
| Patient | Name & DOB |
| Series | Modality & Description |
| Created / Expires | Dates |
| Status | Active / Expired / Revoked |
| Actions | View / Revoke |
Revoking a Link
- Find the link
- Click the Revoke Icon (link with slash)
- Confirm in the modal (optional reason)
- Click "Revoke Access"
⚠️ Important: Revoking is immediate. The patient will lose access instantly.
Step 10
Step 10
This is the experience from the patient's perspective:
- Receive Email: Patient gets a personalized email with a secure link.
- Enter Phone Number: Must match the record on file.
- Send Verification Code: Click to receive a 6-digit SMS OTP.
- Verify OTP: Enter the code and click "Verify".
Once verified, the patient sees their personalized results:
- Narrated Video: AI explanation in selected language
- 3D Video: Flythrough visualization
- Interactive Viewer: Rotate/Zoom 3D model
- Report: Downloadable PDF
If access fails (wrong phone, expired link), the patient sees your Clinic Contact Info to request help.
Step 11
Step 11
Transform raw DICOM into patient-friendly outputs using Credits. Available features:
- 3D Flythrough Video: Animated navigation through the scan
- Narrated Video: AI explanation in the patient's language
- Interactive 3D Viewer: Real-time exploration
How to Request
- Click "Request AI Features" on the Series Card
- Select desired features (3D Video, Narrated Video, Interactive Viewer)
- If "Narrated Video" is selected, choose a language and upload a report for AI context
- Submit the request
Badges update from "Processing" to green when ready. If quality is low, click "Request Redo" in the Video Tab (enter a reason, min 10 chars). Credits are refunded on failure.
Step 12
Step 12
Purchasing Credits
- Navigate to Credits in the sidebar
- Click "Buy Credits"
- Select a package: Starter (500), Professional (2,000), or Enterprise (10,000)
Creating Teams & Inviting Members
- Navigate to Teams
- Click "Create Team" (e.g., "Radiology")
- Select Team → Click "Invite Member" → Enter Email & Role
Admin: Manage settings, buy credits, invite others.
Member: Upload scans, view patients, request features.
Step 13
Step 13
Keyboard Shortcuts
| Navigate Slices | Arrow Keys |
| Zoom | Scroll Wheel |
| Full Screen | F |
| Close Modal | Esc |
Workflow
Troubleshooting
| Issue | Solution |
|---|---|
| Upload Stuck | Check DICOM format |
| Patient missing | Refresh Workspace |
| Share fail | Check Email/Phone |
| Link dead | Check Expiry/Revoked |
| Video waiting | Wait for processing |
Support
Email: winston@naviget.com
© 2026 Naviget Medical Imaging Platform. All rights reserved.